Showing posts with label fruit and veg. Show all posts

Thursday, 20 September 2012

Plum(p up the) Jam


I guess it’s time to finish off those plums.  You remember the plums, the ones from my friend Lindsay’s tree?  The ones I made into two kinds of sauce to go with duck (or stir fried pork and beef since), and chutney, and a tart (that I still have to write up)?  And, as I promised, jam?

This was, I have to admit, the first time I’ve ever made jam, so I won’t pretend to be an expert, but will instead point you in the direction of someone who seems to be.  I did a fair bit of research, and pretty much all the recipes I found were, broadly speaking, much the same - I settled on the Cottage Smallholder’s version though because I liked both the simplicity of the recipe itself and the clarity of its description.  Also because it had a variation specifically for ‘barely ripe’ plums, which was exactly what I was working with.  And although the plums they were talking about were apparently Wild Plums, their picture of them did look just like mine (stop sniggering at the back there…)
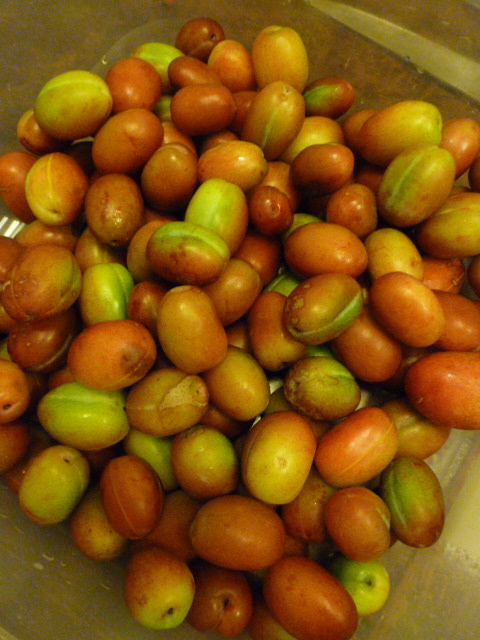

I won’t bother reproducing the recipe here - just click on the link, - as I followed it pretty much line for line, and I wouldn’t want to even give the impression that I was claiming any kind of authorship.  The one twist of my own that I added on this occasion was throwing in a single pod of star anise and a two inch length of cinnamon stick, for an added hint of spice.  By and large, I’d have to say it wasn’t at all bad for a first attempt at jam making - coming out as it did, above all, really plummy - but there are a few things I’d experiment with changing next time.

Firstly, the amount of sugar used.  This was pretty standard in all the recipes I found, at equal weights of fruit and sugar.  In fact I used rather lower proportion of sugar than that, two 1 kilo bags of regular granulated for 2.3 kg of plums.  Still the finished jam was a little bit on the sweet side for my – and particularly Becca’s tastes.  Next time I’ll reduce the sugar content even further, perhaps as far as two parts sugar to 3 of fruit (which would have been about 1.5kg of sugar in this case).  I’ll also add the juice, and maybe the zest, of a lemon or two, just for added zing and a touch of tartness.


I used regular sugar rather than preserving sugar and followed the tip that appears in the comments section below the recipe for adding pectin by cracking a handful of plum stones and tying them up in a muslin bag which you then drop in the pan with the plums for the natural pectin in the plum stone kernels to act as the setting agent.  That was if anything too successful – personally I feel home made jam should be distinctly runny, mine is set firm.  I used about a dozen cracked stones in my muslin bag.  Next time I’d make it a half dozen.

Speaking of setting, the cold plate trick for testing the setting point of jams and jellies has never worked for me.  This is where you put a plate in the fridge and test for setting by drop a blob of your boiling jam/jelly onto the cold plate, put it back in the fridge for a minute or so, then prod it with your finger.  If set the surface of your blob should wrinkle.  I have always just ended up with two cold plates covered in sticky smears, not a sign of a wrinkle, and eventually just gone with gut instinct that if the jam/jelly hasn’t been boiling long enough and hard enough to set now, then it never will.  And if anything, every time my jam/jelly has, if anything come out erring on the side of oversetting.  My medlar jelly in particular – delicious though it was (and still is, just one jar left now…) – could have made a powerball.  I don’t know if this indicates that my fridge just doesn’t get as cold as it claims to, but I don’t think so – it seems satisfactorily chilly in every other regard.  Maybe I should just get myself a jam thermometer.  Or trust to instinct, like I do with most other aspects of cooking…


 One last point – as I said, one of the key things that attracted me to the Cottage Smallholder’s recipe was that it seemed simple.  And it was.   The other impression I got from reading it was that – apart from the steeping of the fruit in sugar over night – it was pretty quick.  It wasn’t.  The only mention of timing in the recipe is 8-10 minutes of continued rapid boiling, rather skipping over the ‘bring to the boil’ bit.  Well, in my experience, bringing over 4kg of combined fruit and sugar to the boil in the first place takes a long time.  A really long time.  After all, you don’t want to turn your biggest, fiercest gas burner on full under the pan, because that’ll just burn the fruit and sugar at the bottom before the heats even got to the top.  And then, the recipe says, once the jam’s reached setting point, at that stage you just carefully remove the plum stones with a slotted spoon as they float to the surface, as if that was the work of a moment.  Again, it’s not.  When you’re working with 2.3kg of small plums, that’s a good twenty minutes worth of prodding and poking (because my plum stones, at least, weren’t cooperative enough to just ‘float up to the surface’) and scooping on it’s own.  So I’d recommend starting that process before you’re even wondering whether or not your jam’s reached setting point.  All in all, I can tell from the timestamps on the photos I took, it was a full three hours from putting the sugar and fruit into the pan to putting lids on jars of jam.  Working with smaller quantities, scooping stones sooner and more efficiently, and having more confidence in your gut telling you that setting point’s been reached even if your cold plate isn’t wrinkling will reduce that time considerably, but still.  Leave yourself a full morning (or afternoon or evening).


And that just leaves the tart.  But in the mean time, here's a tasty bit of crumpet (with a dollop of plum jam)... 


Monday, 17 September 2012

Plums are not the only fruit


The last couple of posts have been on stuff to do with plums, lots of plums (and there’s still jam and tart to come…), but I wouldn’t want you to go away with the idea that this blog is all, and only, about plums these days.  Of course it’s not.  And of course this time of year, the end of the summer and beginning of autumn, is famously the most abundant time ofyear for all sorts of fruit and veg – not to mention wild mushrooms and game.

While it may not be a common feature of the traditional English harvest festival, one of the conspicuous highlights of this time of year round here – here being Dalston, with its many Turkish shops, - is the abundance, and perfect plump ripeness, of fresh figs.  They are, it’s true, available through much of the rest of the year too, these days, but between now and Christmas is the only time they are ever worth buying, and right about this time, from mid August and throughout September, is best of all.  And one of the things that reminds me to be thankful that we live in Dalston, with its many Turkish shops, in any one of which you can buy four figs for a pound.  A rather better deal than the in no way superior looking figs I came across in Fortnum and Masons the other day - having an hour to kill in Piccadilly - being sold for a pound fifty a piece (or four for six pounds).

A perfectly ripe fig is of course, a beautiful and lusciously tempting thing, with its velveteen soft, purple skin and yielding, crimson insides.  It’s easy to see why it has such strong associations with decadence and, mainly, sex.  Although whether or not the experience of eating one is ever actually erotic, I’m not so sure.  Speaking for myself, of course.  Clearly one of the defining features of eroticism is that every individual finds it where they will, and there’s no point trying to say they’re wrong.  If a fig turns you on – or wearing a ball gag or nappy for that matter – who am I to argue that there’s nothing erotic about it.  Speaking for myself, as I am, I’d say pretty much anything loses its erotic potential once that relentless enthusiast for all things erotic - and, particularly, symbolic – DH Lawrence has had done with it…

Like plums, figs are used as direct slang for intimate body parts.  Unlike plums, or anything else I can think of, for that matter, figs have been commonly used as slang for both male and female parts, which is a bit weird but nowhere near as weird as the sex life of the fig itself – if one can use the term sex life for the reproductive mechanism of a plant.  The fruit is in fact an inverted flower, which depends on a particular kind of wasp (of which there is a matching species for each distinct species of fig, and for whom the dependency is mutual) to pollinate it, and within which the female wasp, having pollinated it and laid her eggs within it, dies, and is consumed.  It seems to me that once you know that, any erotic charge that the fig still holds is of a pretty dark, one might say Cronenbergian hue…

Nevertheless, and putting to the back of your mind that every time you eat a fig you’re eating a dead wasp mother (but don’t worry, the lifecycles of the two organisms are, thankfully, synchronised in such a way that there will be no wasp larvae present in any edible fig), a perfectly ripe fig is not only a beautiful and tempting thing, but a sublimely delicious one.  Eat them on their own, with a drizzle of honey or maple syrup.  Or, as I did recently, make a salad of quartered figs, wedges of peach and shredded parma or Serrano ham.  Again, a light drizzle of maple syrup to dress it, and you have yourself a lusciously decadent and delicious – if not downright erotic – lunch , or better still, breakfast, dish.


Thursday, 6 September 2012

Still Crazy: Green Plum Chutney


Even after having had two goes at making a sauce for a pair of roasted duck breasts, that still left a lot of plums to get through.  My plan for the greenest of them had always been chutney.  Not unlike the similarly green tomato chutney that was the subject of one of my very first posts on this blog.  The technique was pretty much exactly as described for that, although I left out the turmeric, which didn’t really seem a necessary or appropriate complement to the plums.  I also notice that in the two years (two years!) since I wrote that post I have become rather more of a purist in the spice toasting department.  I now toast the whole seeds in the dry pan prior to pounding them to a powder with pestle and mortar, rather than vice versa.  How much difference that makes to the flavour of the finished dish I couldn’t really say – marginal would probably be about right, but it does reduce the chances of over toasting, i.e. burning, the spices and ending up with something acrid and bitter rather than warmly flavour enhancing.  It’s also possible that it – again marginally – makes the pestle&mortaring easier, so given that it’s not actually any more hassle (although it does, admittedly, take a minute or two longer) you really may as well.  It does slightly change the order of events – as before, I now start by toasting spice seeds, but then they’re removed to be pounded, and the chutney cooking itself starts with the garlic, chilli and onions softening gently in oil - in the same pan, you may as well make use of any residual flavour the spice toasting as left behind.  Then I add the powdered spices to the onion as it cooks.  It’s not a radical change.


Green Plum Chutney

1kg green plums
4 small onions (about 400g)
100g raisins
150ml cider vinegar
Star Anise
Cinnamon stick
Garlic
Chilli (dried or fresh)
Spice seeds – black pepper, coriander, mustard, cumin, fennel etc, toasted and pounded together with rock salt

Stone and quarter the plums; peel and dice the onions small; finely slice the garlic and chilli (as usual I’m leaving quantities of those to you and your taste – I use plenty). 


Soften the onion, garlic and chilli in a little oil (I used olive, but sunflower, groundnut etc is fine), sprinkle with the spices, add the plums and cook till starting to soften, then add the raisins.  Cook a little more and add the vinegar.  Keep cooking till the consistency’s suitably gloopy and the vinegar’s eye-watering punch has mellowed.  Spoon into sterilised jars.  Serve with tangy cheddar cheese (assuming you don’t have a dairy allergy – sorry Becca) or a pork pie.


Ah.  Pork pies.  I’ve said it before and I’ll no doubt say it again:  I do like a pork pie.  I’ve also said before that I was definitely going to make one myself, one day.  That day has yet to come.  I do now, though, have the good fortune to find myself working a day or two a week down at Borough Market – probably London’s (and presumably the UK’s) biggest and best food market – as part of my day (or more often evening) job for Borough Wines.  Our stall is almost directly opposite Mrs King’s pie stall, and Mrs King, it has to be said, does make exceedingly good pies.  They are that rare thing these days – a pork pie that actually tastes of pork.  And with proper crispy, crumbly pastry, and jelly and everything.  Mrs King’s pies inspire me to make my own, while simultaneously raising the question ‘why bother?’.  So far, I admit, the question comfortably trumps the inspiration…


Tuesday, 4 September 2012

Plum Crazy


Last week my good friend Lindsay sent a plea for help.  The plum tree in her back garden was so overladen with fruit that it represented a danger to itself and others, and was in need of a radical plum-ectomy.  Of course I was happy to help out.  We spent a thoroughly entertaining couple of hours teetering on precariously propped ladders, poking at out of reach branches with long sticks, and showering small children with plums of every stage of development from rock hard to mouldering mush.  At the end of the morning I came home with three large bags, filled with plums of all stages of development save the last.


The contents of the three bags had been sorted, into thoroughly unripe, not quite ripe, and ripe and ready to eat.  The latter went straight into the fruit bowl, of course; the others, of each of which there was a far greater quantity, demanded rather more thought.  Not that it really took a huge amount of either effort or intelligence to come up with the following thoughts:  chutney; jam; tart and sauce. 

And once I’d come up with plum sauce, it was scarcely an intuitive leap of genius to get to roast duck, either, and as luck would have it they happen to have duck breasts at half price in Sainsburys at the moment.  Which was, as the man from The Fast Show would say, nice.

Roast duck breasts, with or without a plum sauce is one of those things that I couldn’t believe that I hadn’t written up here already – to the extent that I did several searches through my blog history, before being entirely convinced.  Mainly because a roast duck breast is one of those things – not unlike a pork tenderloin fillet, and for similar reasons – that is so quick and easy to do you can knock it together on a weekday evening after getting home from work, and yet produces a meal that is not only delicious, but feels like a rather luxurious treat.  And when the duck breasts themselves are half price – which they do quite often seem to be, at our local Sainsburys at least - it’s not too pricey either.  Not cheap, but, I think, worth it in a way that buying individual chicken breasts, never, ever is.  Not least because individual chicken breasts are, frankly, pretty uninspiring slabs of meat, so much less tasty, or versatile, than the same chicken’s own very much cheaper legs, while a duck breast, with its luscious layer of fat and crispable skin, really is a prime cut.


Another advantage of the roast duck breast - and, again something it shares with the pork tenderloin – although not relevant on this particular occasion, is that it’s something that’s very easily scale-able.  It really is one of those few things that’s as do-able for two as it is for twenty – and it’s scarcely more work for a larger number, it’s just a matter of the size of your pan/s.

Here and now though, it was just a dinner for two.  Which obviously meant that the sauce for it wasn’t going to make much of a dent in our current glut of plums, but never mind.  Perhaps in acknowledgement of that fact, I ended up making not one, but two plum sauces to go with my duck, thereby getting through twice the number of plums.  I say perhaps, but that’s a lie – the truth is that I just wasn’t happy with the first sauce.  Not that there was anything wrong with it, as a sauce, it just wasn’t right for the dish I had in mind, being too intense and concentrated.  It would have smothered the duck.  So I made a lighter, looser sauce – basically a compote - to go over the duck, and served the first sauce on the side like a ketchup.

Spicy plum ketchup:
6-8 plums
1 small onion (or shallot)
chilli
garlic
pomegranate molasses
good red wine or sherry vinegar
1/2 star anise
Salt, pepper


I finely chopped the onion, a clove of garlic and about a little fingernail’s worth of fresh chilli and put them, with a good slug of olive oil, in a small saucepan over a lowish heat.  Using a pestle and mortar a crushed a handful of black peppercorns, the star anise and a pinch of rock salt into powder and sprinkled it in with the onion.  While the onion was softening, I took a handful of plums – choosing a pretty random mix of ripenesses - halved and stoned them before adding to the pan once the onion was soft and translucent.  I allowed them to cook for about 10-15 minutes, till softening but still holding their shape, then added a good dash of the pomegranate and vinegar – probably about a dessertspoon of each.  Then I allowed the pan to simmer gently, for about another 15 minutes or so, till the liquid was reduced by maybe as much as a third, and the vinegar had lost its sting.

Then I checked for seasoning.  It had plenty, along with the tang of the vinegar, the sweetness of plums and pomegranate and a distinct hit of chilli heat.  That was the point that I decided that my original plan, to coat the duck breasts in this sauce, might need to be rethought.  This sauce was good, but it was not the right sauce - there was just a bit too much going on.

Fortunately, I’d been making the sauce in advance, so it was no problem just to set the pan aside for the sauce to cool, before blitzing it down to ketchup consistency - about 200ml worth, and a lovely, purpley/chocolatey colour - for a dipping sauce, leaving plenty of time to make up another sauce to pour over the duck.  A very quick, easy and tasty sauce, but nevertheless, one that wouldn’t overwhelm the duck.


Very mildly spicy plum compote:
6-8 plums
Star anise
Citrus zest (Satsuma and lemon in this case, or orange)
Splash of gin
Pinch of mixed spice


Again, I picked a handful of plums of varying degrees of ripeness and halved and stoned them.  I put them in a pan with just a smear of olive oil in the bottom to discourage sticking and gently started to cook them.  Meanwhile I used a veg peeler to shave a couple of good strips of zest each from a lemon and a Satsuma and threw those into the pan, along with the juice squeezed from half the lemon.  I sprinkled the plums with just a pinch of the spice mix I’d prepared for making  the plum chutney I’ll write up in my next post, but which consisted of salt, pepper and toasted fennel, coriander, cumin and mustard seeds, all crushed to a fine powder with pestle and mortar – allspice, cloves and cinnamon could go in there too, if you want, or indeed instead, but the key thing, rather than the specific spices used in this instance, was to keep the spicing light.  Then I added a good slug of gin and let everything cook together gently until the plums were soft but still plum shaped, and the gin and juices had reduced to a nice light syrup – literally no more than 10-15 minutes.  And that was that.  All ready to be spooned over the duck.

Roast duck breasts
Duck Breasts
Salt, pepper, star anise

Score the skin of the duck breasts, trying not to  slice right through the fat to the flesh below (but it’s not a disaster if the odd score does go all the way through.  Using a pestle and mortar, pound together a good pinch of rocksalt, a couple of dozen or so peppercorns and a star anise, and rub the resulting powder into the scored skin side of the breasts, rubbing any excess into the flesh side for good measure.

Get a metal handled (or otherwise oven proof) frying pan good and hot and sear the breasts, skin side down until crusted a dark golden brown.  Then turn the breasts in the pan and transer, skin side now up, to the oven, preheated to 180-200.  Roast for 10-12 minutes depending on the thickness of the breasts and the rareness you like.  Maybe as much as 15 minutes if you or your guests are squeamish about pink running juices.  Neither Becca nor I are (squeamish that is), you probably won’t be surprised to hear, but, unlike many alleged experts, I wouldn’t presume to sneer at anyone who preferred their duck, lamb or steak well done.  Different strokes and all that.  I was at a restaurant once with a work colleague who sent her lamb chops back three times to get it cooked beyond pink – and while I happen to share the chef’s opinion on the optimum degree of doneness for a lamb cutlet, I couldn’t understand his (or her – but I bet it was a him) dogged refusal to cook it any discernable degree further to suit the tastes of a paying customer.  That’s just arrogant and rude.


After taking the duck breasts out of the oven leave to rest for a good ten to fifteen minutes (you could even make the second plum sauce while the meat relaxes) before serving.  I like to slice them before plating up, but by all means serve them whole if you prefer (different strokes etc).  I spooned the compote over the sliced breasts and then I’m afraid I drizzled the spicy plum ketchup over and around the meat.  Given my time again I’d just spoon a single big blob onto the side of the plate like proper ketchup.


As the oven was on anyway I roasted up some potato, celery carrots and four giant cloves of garlic, with a handful of spring onions thrown into the roasting dish when I opened the oven to remove the duck.


The rest of the spicy plum ketchup - that which did not get drizzled (sorry) - is in a pot in the fridge.  It's already made an excellent dipping sauce for a delicious Vietnamese style pork belly stir fry that Becca made.


There was also a plum tart for dessert, but I’ll write that up in a separate post.

Tuesday, 17 April 2012

Springtime for… pork shoulder in a fruity stew


Half way through April now – sorry I haven’t been updating the blog much recently, but real life does have a habit of getting in the way – and spring, I guess is in full swing now.  Although in many ways it doesn’t really feel that way, perhaps on account of all the news bulletins being full of drought stories, when, that is, they’re not full of stories of half the country being brought to grinding halt by snow (as predicted right here, people!).  Although perhaps we’ve become accustomed to seeing sinister patterns and isolating freak abnormalities in our weather - and extrapolating day to day weather into climate - whereas in fact it’s perfectly ordinary, unremarkable and indeed characteristic of spring time that the weather might swing from high summer one day to midwinter the next.  Not, I hasten to add, that I’m sceptical about climate change, let alone in denial.  Unlike this idiot.

Whatever its causes, the current state of the climate – sorry, the weather – makes it tricky to plan ahead when it comes to deciding what’s for dinner, having no way of knowing whether tomorrow will be a porridge for breakfast or a salad on the roof terrace for lunch kind of a day.  So what’s called for at this time of year are things that are versatile in the meals that we can make from them – things like fish, for instance, or the chicken I’ve covered in my last couple of posts.  Or we just say, to hell with it, we don’t seem to have had pork for a long time (hard to believe for regular followers of this blog as that may be) and that’s a nice looking piece of boneless pork shoulder reduced to a bargain price, let’s have that.  Which is what I did last week.  That said, I did consider the weather when it came to deciding how to cook it.


I could just have roasted it, of course, and I’m quite sure that would have been both delicious, and weather appropriate – when is roast pork ever not seasonally appropriate (apart from Passover, obviously, or Ramadan…)?  But I had some fruit – an orange and a couple of apples just starting to go soft in the bowl, so I decided a fruity pork stew would be just the thing – big and hearty enough should the day turn out bitter and bleak; bright and fresh flavoured enough should it be bright and sparkly.


I started by chopping my joint into big chunks, rough cubes a good couple of inches or more a side.  Then I put them into a bowl and grated the zest of my orange over them, then added crushed garlic and chilli, a teaspoonful each of paprika and sumac and a generous sprinkling of fennel seeds, black peppercorns and sea salt, gently pounded with pestle and mortar, the juice of the orange and a good glug of olive oil, rubbed it all together and put the bowl in the fridge to marinate overnight.  The precise ingredients and proportions for your marinade is, of course, optional, being entirely up to you and the contents of your store cupboard, as indeed is the overnight thing.  If you’re cooking for tonight then just give it as long as you can, but in that case don’t refrigerate it, the action of the marinade will be speeded up at room temperature.


When you’re ready to start to cook (and precisely when that might be in relation to when you’re going to eat is again optional – from a minimum of two hours to a whole day or more before, the longer, within reason, the better.  Whenever it is though, hopefully you’ll have had the opportunity to remove the marinading meat from the fridge, if that’s where it’s been, long enough ahead to come back up to room temperature) then start by gently browning the meat in a big, solid casserole.  While the meat is browning roughly chop a carrot, an onion and a stick or two of celery (I cut my onion into slim wedges and my carrot into batons, but exactly how you chop is up to you), and throw them in once the pork has taken on some colour (with pork I just tend to add the veg to the meat in the pan, rather than removing the meat and adding back later on – mainly because I’m not looking to get the same kind of deep colour on pork as I would be on red meat or chicken skin, so I start at a lower temperature, rather than with the heat up high then turning it down).  Throw in a bay leaf, too and maybe some sage leaves or thyme.  Once the veg is starting to soften perceptibly, pour over any remaining liquid from the marinade, and enough cider to just about two thirds cover (this doesn’t need to be precise, but be careful not to drown your dish), bring to a gentle simmer and transfer to a low oven.

How low, and therefore how long for depends very much, like the marinating, on how long you’ve got, and to a certain extent on how many people your cooking for and therefore the sheer volume of stew we’re dealing with.  About 170 for an hour and a half to two hours would probably do it at a pinch.  150 for two to three would be better.  And in an ideal world, 130, or even lower for three, four or even five for a big pot in a good low oven.  Basically as long as you’ve got at as low as you can, until the meat can be cut with a spoon and the fat’s turned to an unctuously sweet, slightly sticky jelly.  And preferably, as ever with a stew, the day before you were planning on serving it.


Whichever, about half an hour before your stew’s due to serve (or when you start reheating it if you did do it the day before), gently fry up some thickly sliced (or halved if they’re small) mushrooms and a couple of apples peeled, cored and cut into lengthwise quarters, then eighths.  Get a bit of golden colour into the apple wedges then add them and the mushrooms to the stew – checking the seasoning at this point, and the liquid level, you might want to top up with a little extra cider or a splash of stock at this point – for the final half hour or so of simmering.

I’d serve with mash on a more wintery kind of spring day, perhaps mash with a dessert spoon of mustard stirred through it, or with rice, perhaps, of a springier evening.


This recipe would work equally well with pork belly too.


Friday, 17 February 2012

A new definition of comfort food: Smoked Haddock Risotto


A couple of posts back I wrote about how, at this time of year and with the arrival of (finally!) some proper winter weather, then food-wise it was all about big meaty stews and hearty soups, and then I went ahead and wrote up a chickpea and spinach dish just to be contrary/prove there was an alternative.  That last bit was plainly unnecessary.  Looking back over the posts I’ve published since the turn of the year proves me to be a liar: it’s apparently not about meat, stews and hearty soups at all - or at least only one post in 9 covering any of that would certainly suggest not – it’s mainly about fish and veg.  So to continue in the same vein, here’s the smoked haddock risotto I promised in my last fishy post.  Of course, what this time of year is really about, foodwise, is comfort food, and this particular dish meets every kind of definition of comfort food I can think of.  In fact I’d have to say it pretty much provides a definition in itself.

First thing, of course, is to get yourself some smoked haddock, by which I mean natural smoked haddock, which you will find on the fishmonger’s slab in a pale and interesting shade of golden beige, NOT a lurid chrome yellow.  I the food snobbery and hate to make any statement that might be interpreted as such, but really – bright yellow smoked haddock?  Why?  Who the fuck’s idea was that, and how did it catch on?  Stop it, all right?  Just stop it.

Anyway, once you have your haddock, slice an onion and a bulb of fennel, in roughly equal quantities, and make a bed of them in the bottom of a suitable risotto making pan, along with a few fronds of the fennel leaves if the bulb has them, and a twist or two of black pepper.  Lay your haddock fillet on this bed and pour over a glass of white wine.  You need to cover the onion/fennel bed, but the fish itself doesn’t need to be submerged.  Cover the pan and put it over a lowish heat to bring the wine to the simmer and gently poach the fish for little more than a minute, maybe as many as two for a particularly thick fillet, once the wine is simmering.  Err on the side of underdone at this point.

Remove the fish and put it in a dish, pour the poaching wine over it, leaving the onion and fennel in the pan.  Add a little olive oil and a sprinkling of fresh thyme leaves – and maybe a little finely sliced or crushed garlic, although this is one of the few instances where I’d be inclined to make a risotto without – you may also want to turn up the heat just a little, until the onion and fennel are just turning soft and translucent.  From this point on you are simply making a risotto in the usual way, adding the rice to the onion base, then half a glass of wine and hot fish stock a ladleful at a time (my stock was made from the frames of the sardines – or rather ‘aloha’ - I’d filleted the week before, and put in the freezer for quick and easy stock making when needed: I just put the frozen carcasses in a pan with a stick of celery, a carrot and an onion, all very roughly chopped and a sprinkling of herbs and spices, cover with water, bring to the boil and gently simmer for about 20 minutes.)


While the risottos cooking, add a good handful of frozen peas to the dish of haddock and poaching liquid, and a smaller quantity  of rinsed capers (I’d suggest a pea:caper ratio of 4:1 or thereabouts.  The capers are, of course, optional, but then so is everything in a recipe…).  There’s no need to cook the peas, the residual heat from the poaching liquid will do most of that and they’ll finish cooking with the risotto.

When the risotto is just a fraction short of done add the dish of fish, peas, capers and wine, a final splash of hot stock and stir it all through.  Add some fennel fronds, torn celery leaves and/or fresh parsley.  Stir it all through, letting it cook together for a minute or two, no more, and serve up.


Simple, beautiful, comforting and very delicious.  And, credit where it's due, even if it can be only vaguely assigned: I owe the idea for this dish to a customer who came into the wine shop where I work part time, asking for a bottle of wine to cook it with - and of course to drink with it.  I'm afraid I can't remember who he was, or even what wine I recommended, but it would definitely have been something light, crisp and fresh, but with real depth of flavour and just a hint of aromatics - perhaps an Alsace pinot blanc, or a Spanish verdejo.

Monday, 6 February 2012

Let it snow - as long as you've got tins of chickpeas (or other beans) in your larder


Snow!  It’s winter at last.  That would make hearty stews and chunky soups the obvious choice.  And it’s not always wrong, or boring, to take the obvious choice.  Often, with food at at least, the obvious is obvious on account of being simply right and appropriate.  Don’t call it ‘obvious’, call it ‘seasonal’ and not only does it not read as wrong and boring, it’s suddenly both fashionable and worthy.

So yes, by all means, fill your casserole with big lumps of meat, and leave to cook long and slow in a low oven while you go out and build a snowman, or simply snuggle up in front of a blazing fire (or the TV) with a bottle of something rich and red.

But when it really snows, sometimes it’s a question of conjuring something filling and heartwarming out of what you have in the larder.  After all, you may very well wake up to a winter wonderland without a kilo of either pork belly or oxtail in your fridge, the cheeks of neither ox or pig, no shanks of lamb or pork; and if you are actually snowed in – or simply don’t care to venture out into the teeth of the blizzard - no means of getting any.

Tinned pulses are something I would always hope to have in my larder – at least one, preferably all, of chickpeas, cannellini, borlotti and butter beans, any of which can supply the protein basis of a hearty winter meal.  Tinned tomatoes too, of course, are a constant staple.  This time of year the chances are I’ll also have a parsnip or two and some carrots, and of course a bag of potatoes and a few onions.  As long as you have these few items and some tasty stock (in your fridge, freezer or out of a tub of Marigold instant veg stock, another basic larder staple I’d never wish to be out of) you have yourself dinner.

The other day, finding myself with a single parsnip and carrot, and just a few potatoes in the larder, half a tin of chopped tomatoes and half a bag of spinach in the fridge I decided to use them all up to make a delicious and heartwarming wintery version of chickpea and spinach stew, served alongside a layered potato, parsnip and carrot bake – a kind of winter veg gratin or boulangere, I guess.

The chickpea stew is a not particularly adapted version of the Spanish tapas classic garbanzos con espinacas, a brilliantly versatile dish that’s equally suited to being a side dish or the main feature of a meal, can be served hot or cold, winter or summer alike – and perhaps the best thing about it is it’s so quick and easy to make.  Just fry some onion with garlic and spices add the chickpeas, a little stock, stir in a big bunch of spinach at the end and Bob’s your Mum’s brother.  Or you can add a few other bits and pieces as I did.  On this occasion, a few mushrooms and that half tin of chopped tomatoes.  You could easily add a little shredded bacon if you wanted to, or even better, chorizo and/or morcilla (or good old British black pudding).  If you don't have chickpeas, any of the other regular beans will make a perfectly adequate substitute, but the slightly crunchy texture of the chickpea is best suited to this dish. Other, softer beans will lend a different, not necessarily inferior, character to it.


For the winter veg Boulangere

1 parsnip,
1 carrot
4 potatoes (floury ones like King Edwards or Maris piper)
1 onion
250ml stock (any stock you like, I prefer a strong flavoured stock like beef for this dish, but if you’re making it to go with the chickpea dish above, then the same, lighter, stock you’d use for that is just fine)
Garlic
Thyme

Finely slice the root veg, to no more than the thickness of a pound coin, thinner if you can - perhaps the thickness of a two pence piece. Slice the onion rather thicker.  Most recipes then simply advise constructing the dish by layering all the components in your gratin dish raw, I have found that this is often unsatisfactory – the different components, cooking at different rates tend not to soften and combine as you’d wish.  My trick is to put the sliced potatoes into a pan with the stock and bring them to the boil and straining of the stock.  This does create a little more washing up and makes handling the hot potato a little trickier, but I find the finished result is worth it.  I also quickly soften the onion in a frying pan, in a little olive oil, with some finely sliced garlic, thyme leaves and salt and pepper.  Then I layer the gratin dish.  Always start and finish with a layer of potato, what you do in between is up to you, but in this case I went potato, onion, parsnip and carrot together, onion, potato.  Then pour over the hot stock, enough so it's just visible at the level of the top potato layer - don't flood the dish.

Bake in the oven at around 200, for about half an hour.  You might want to turn up the heat at the end to get a golden top layer, or finish it under the grill.


For the Chickpea stew (or Garbanzos con Espinacas if you prefer, and I think I do)

1 x 400g tin of chickpeas (you can of course use dried, they are superior in texture and flavour, but less convenient and it’s convenience that’s key here)
1 small onion (red for aesthetic preference, but regular yellow is fine)
Garlic
Chilli
Spices (any or all of cumin, coriander and fennel seeds, lightly crushed, a pinch of turmeric or saffron, salt and pepper, obviously)
Half a dozen or so chesnut mushrooms chunkily sliced or halved/quartered depending on size)
Half a tin of chopped tomatoes (or two or three fresh tomatoes skinned, deseeded and chopped)
A couple of big handfuls of young leaf spinach
250ml hot stock (ham, chicken or veg)

Gently fry the onion with the garlic, chilli and spices in a little olive oil till the onion is softening, then add the mushrooms (and tomatoes if you’re using fresh ) and cook for about another minute or two before adding the chickpeas and the stock, cook together for about ten minutes, at a gentle simmer, preferably covered.  Immediately before you are ready to eat, throw in the spinach and stir it through.

If you want to add bacon or chorizo, do that right at the beginning.  If I was going to add blood sausage, I’d do so at the same stage as the mushrooms.  If you’re using dried chick peas you will obviously have had to soak and cook them first.


Monday, 16 January 2012

Purple Risotto


In my last post I described roasting middle rib of beef, this, obviously, left us with a couple of rib bones, and – as I mentioned in passing in that last post – of course bones = stock.  Also as mentioned, I’d served my roast ribs with pickled red cabbage, which had left me with half a head of red cabbage.  Given how well red cabbage works as an accompaniment to beef, it occurred to me to use the rest of the cabbage with at least some of the beefy stock I made from the ribs.  So I made a red cabbage risotto, which not only neatly combined the two, but also addressed the one area where risotto does rather let itself down: it’s tendency to look a little bland.  For all their virtues - and they are many, and cherished – most risotti do come out somewhere in the magnolia area of the colour chart.  Not with red cabbage in them they don’t... 


I started by toasting pine nuts in the dry pan, then added a little olive oil, a handful of shredded bacon (or you could substitute that for a couple of chopped anchovy fillets) and a sprinkling of raisins (or chopped dried apricots would also be good).  Then I stirred in the cabbage, onion (I used red onion too, just to keep with the colour theme.  As for quantities, for the two of us - although it would have been enough for three, or even four as a starter or light lunch - a quarter of a head of red cabbage and half an onion seemed good) and a finely sliced clove of garlic, cooked till starting to soften, then added the rice, wine (red instead of the usual white) and my beef stock following the normal routine.  It turned out both delicious and very pretty.


Obviously you could do a veggie version of this dish by leaving out the bacon and using vegetable stock.  Of course, that way you’d miss out on the beef/cabbage combo that suggested it to me in the first place, but I’m sure it would still be delicious (particularly if you were still allowed the anchovies in place of the bacon), and perhaps above all, it would still come out that lovely, and unusual, deep purple colour.


Thursday, 5 January 2012

Cauliflower Every Day 2: Cauli risotto (ai cavolfiori)


I know I said in my previous post that if I ate cauliflower every day its appeal would soon wane, but a couple of days consecutive cauli eating doesn’t begin to approach that point.  Which is good, because just half the head of a good sized cauliflower made enough curry for the two of us, with enough left over for a light lunch for one the next day.  Leaving the other half for a second dinner, which gave me a chance to try out this Jamie Oliver recipe, for risotto ai cavolfiori, taken from his Italy book.  You can think what you like about Jamie Oliver – and, like coriander I can fully understand why he’s not to everyone’s taste – but even back in his most annoying, cheeky chappie, bish bash bosh, scooter riding geezer ‘Naked Chef’ (FFS) phase, I always felt that the food, and his approach to cooking it, was spot on.  In fact that might, ultimately, have been the most annoying thing about him, even then, which was saying something.

These days of course, following all his campaigning work on improving the diet of this and other nations, particularly in our schools, Jamie’s approaching the status of a national treasure.  And he probably won’t even count as our most annoying national treasure either – this being a nation that treasures Bruce Forsyth.  And I have to say, speaking personally, it’s not just for his contribution to school dinners that we should appreciate young James, even if it is grudgingly (and in my case I have to say it’s not): simply being the anti-Gordon Ramsay is reason enough to embrace him.  I’d also have to add his recent book and TV series on British food, which, for all its roast beef and union jack imagery, and Jamie’s own Essex laddishness, turned out to be an open hearted celebration of the contribution made to what we call British cuisine by the many and varied immigrant communities that have come to call Britain home over the centuries.  For that, as for so many other things he’s done over the years, I find myself unreservedly saying ‘good on yer, Jamie.’  Even if I would prefer it if you didn’t address me as ‘Geez’…

That, of course is by the by.  Back to cauliflower: I particularly liked the sound of this risotto recipe, not just because it was a new, non cheesy (Jamie of course does include parmesan, I simply leave it out – you are free to do either, if not allergic) thing to do with cauliflower, but it also gave an excuse to use the word ‘cavolfiore’ which, even by Italian standards is a particularly lovely word.  Perhaps more relevantly I also liked the efficiency of the recipe, using the chopped cauliflower stalk as part of the onion/shallot base for the risotto, and part cooking the florets just by steeping them in the hot stock.


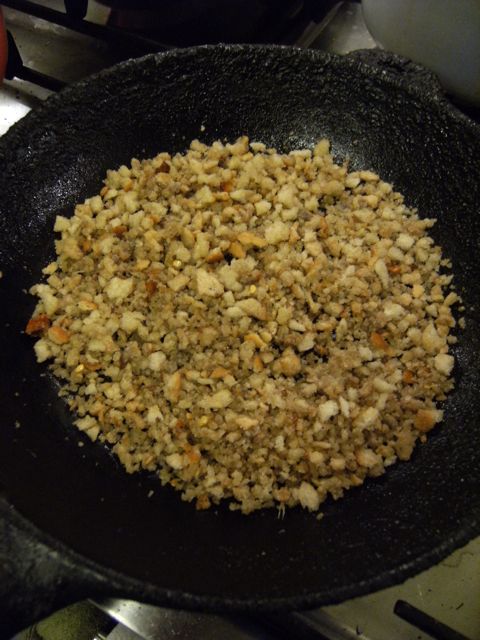
I also loved the sound of the ‘pangrattata’ bit – the anchovy & chilli breadcrumbs, giving crunch and added spiky flavour to a dish that otherwise might risk being bland.  And even though I fried it a bit beyond the ideal golden brown to something more like burnt umber on account of leaving the pan over a low flame when I thought I’d turned it off, this proved to be no disappointment, and is something I’ll definitely be adopting as a regular user up of slightly stale bread from now on.

I followed the recipe pretty much as written, using my own technique for the basic risotto (‘risotto bianco’) which, of course, skips the parmesan, although I did add a crushed clove of garlic to the breadcrumb mix, because why wouldn’t you?  It was thoroughly delicious, and as comfort food goes, I’d suggest it was potentially somewhere right up there with cauliflower cheese.  And that is really saying something.